Introduction
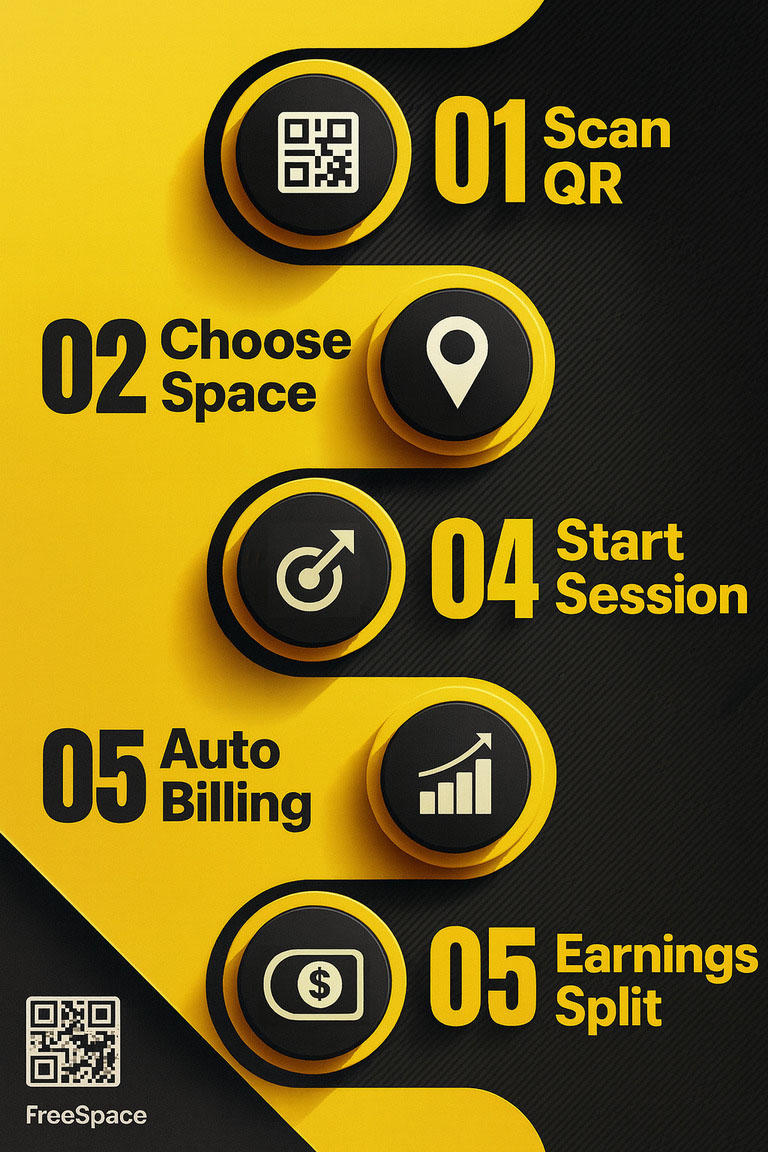
FreeSpace lets shops monetize their idle space with by-the-minute rentals. Customers scan a QR to start/stop usage— no counter, no paperwork.
The idea in a nutshell
Many stores, supermarkets and offices have unused corners that sit empty. FreeSpace connects those spaces with customers. A Shop Owner sets a per-minute rate; customers scan a QR and pay only for the minutes they use. The platform takes an admin commission on each bill so the business model is built-in.
How it works
- Users register and get their personal QR card.
- At any registered shop, scan to start the timer.
- When finished, scan again to stop; pay instantly or keep as due.
Pricing example
Per-minute rate = 10 BDT, usage = 20 minutes → total 200 BDT.
With a 10% admin fee, Admin gets 20 BDT and the
Shop Owner gets 180 BDT.
Why it’s great (and why buy)
- SaaS-ready product: Complete frontend, backend and REST API — deploy or rebrand for commercial use (CodeCanyon-friendly).
- Proven business model: Per-minute pricing + built-in commission/settlement workflow.
- Real-time experience: Live start/stop and notifications via Laravel Reverb & Laravel notifications table.
- Role-based access: Customer, Shop Owner, Admin, Super Admin using spatie/laravel-permission.
- Developer-friendly: Service-layer architecture, DI, clean routes, Form Requests & API Resources.
- Mobile/SPA ready: All endpoints documented with Scribe — easy to ship native apps or a separate SPA later.
- Ops-ready: Docker & Kubernetes files, .env examples, and clear docs to get running fast.
- Stripe: Stripe Payment getway setup. [webhook setup]
Under the hood
Built with Laravel 12, Inertia.js + Vue.js,
realtime via Laravel Reverb, roles/permissions by
spatie/laravel-permission, notifications using Laravel’s
notifications table, and
MySQL as the database. REST APIs are documented with
Scribe so you can plug in a mobile app or SPA anytime.
Development Practices
The codebase is organized so developers can change or extend features quickly and safely. Frontend pieces are split into small, reusable components, and the backend business logic lives in clear Service classes with Dependency Injection (DI).
Structure & Patterns
- Component-wise UI: Small, focused Vue components for easier reuse and testing.
- Service layer: All business rules are implemented in Service classes, keeping controllers thin.
- DI everywhere: Services and dependencies are injected, making code easier to swap or mock.
Routes by Context
Routes are split into small files by role to stay tidy and readable:
                    routes/
                    ├─ admin.php        # all admin routes
                    ├─ auth.php         # all auth routes
                    ├─ api.php          # all api routes
                    ├─ channels.php     # all channels routes
                    ├─ console.php      # all console routes
                    ├─ customer.php     # all customer routes
                    ├─ shop_owner.php   # all shop-owner routes
                    └─ common.php       # shared/common routes
Requests & Resources
- Form Request classes handle validation per endpoint/method.
- API Resource classes shape clean, consistent JSON responses.
With this setup, any developer can quickly adjust existing behavior or add new business logic without breaking other parts of the app.
Key Features
- QR scan to start/stop usage timer
- Per-minute pricing with admin commission
- Realtime notifications (Laravel Reverb)
- Spatie Roles & Permissions (Customer / Shop Owner / Admin / Super Admin)
- Reports & dashboards (payments, usage, settlements)
- Settlement workflow: Unsettled / Hold / Cancel / Settled
- Campaigns & notifications center
- Nearby shops, transactions history, profile
- QR print/download (Customer & Shop Owner)
- Pay now or keep as Due flow
- Full REST API documented with Scribe (
/docs) - Service-layer architecture, DI, Form Requests & API Resources
- Routes split by context (admin, auth, api, channels, console, customer, shop_owner, common)
- Dockerized app: Dockerfile +
docker-compose.yml(dev & prod) - Kubernetes manifests (
k8s/) for cluster deploy - Environment templates:
.env.example,.env.docker,.env.production - Nginx/PHP-FPM config samples (
config/) - Demo accounts included for quick testing
- MySQL-backed data model, ready for scale
App Folder Structure
├─ free-space/                     # ← Laravel project root
   ├─ app/                  # domain code (Models, Policies, Services…)
   ├─ bootstrap/
   ├─ config/
   ├─ database/             # migrations & seeders
   ├─ public/
   ├─ resources/            # Inertia/Vue pages & components
   ├─ routes/               # api.php, web.php (plus split route files)
   ├─ storage/
   ├─ tests/
   ├─ vendor/
   ├─ .env                  # app env (local/prod copy lives here)
   ├─ .env.example
   ├─ artisan
   ├─ composer.json
   ├─ composer.lock
   ├─ package.json
   ├─ package-lock.json
   ├─ phpunit.xml
   └─ vite.config.js
dockerize-k8s Structure
project/
├─ .docker/                 # docker helpers, nginx conf, etc.
├─ k8s/                     # Kubernetes manifests
├─ config/                  # ops config (nginx, php ect)
│
├─ app/..                   # ← Laravel project root
├─ .dockerignore
├─ .env.docker              # env for docker compose
├─ .env.production          # prod overrides (copied into app/.env in CI)
├─ docker-compose.yml
├─ docker-compose.prod.yml
├─ Dockerfile               # build web/phpp-fpm image
└─ run-command.txt          # helper commands
System Requirements
- PHP 8.3+, Composer
- MySQL 8+
- Node 20+, npm
- Web server (Nginx/Apache) pointing to
/public - Open ports for Reverb/WebSocket (e.g., 8081) or reverse proxy
How It Works
FreeSpace is simple: scan a QR, pick a space, and pay only for the minutes you use. Below are two quick flows—one from the Shop Owner side and one from the Customer side.
Sample QR Codes


Shop Owner Flow
- Print or save the Customer’s QR code (or sign in as that customer and get their QR).
- Go to any registered shop; Open Shop Owner’s Web Cam.
- Scan the customer’s QR with the camera.
- Select a space from the available list to start usage.
Customer Flow
- Go to any registered shop; the welcome desk shows the Shop Owner’s QR.
- Sign in with your Customer account.
- Click “QR Scanner On” to start the webcam.
- Scan the Shop Owner’s QR.
- Pick a space to start the timer. Scan again to stop and see the cost.
Demo Logins (for testing)
Shop Owners
shopowner1@example.com … shopowner20@example.com
Password: password (all lowercase)
Customers
customer1@example.com … customer30@example.com
Password: password (all lowercase)
Admin
Email: admin@example.com
Password: password
Super Admin
Email: superadmin@example.com
Password: password
Video: How It Works
Video: App Overview
App Features – Web (Customer)
- Dashboard with QR Code Print/Download and QR Scanner (webcam)
- Scan to start timer; scan again to stop
- Payment modal shows duration & total; can pay now or keep as Due
- Nearby Shops, Transactions History, Profile
App Features – Web (Shop Owner)
- Dashboard with own QR (Print/Download) & Scanner
- Current Status: Spaces list & Today’s Due Bills
- Reports: Today & Current Month (filter by month)
- Payment Settlement: Unsettled summary (online vs cash) → Request to Settle; Monthly Settled
- Manage Spaces, Campaigns, Notifications, Profile
App Features – Admin
- Dashboard charts: 30‑day Payment Summary, daily Space Usage, daily Settlement Status
- Reports: Today’s Transactions & Current Month (per Shop Owner)
- Payment Settlement tabs: Unsettled / Hold / Cancel / Settled
- Shops tabs: Requests / Active / De‑Active / Banned + Shop Types management
- Campaigns, Notifications, Profile
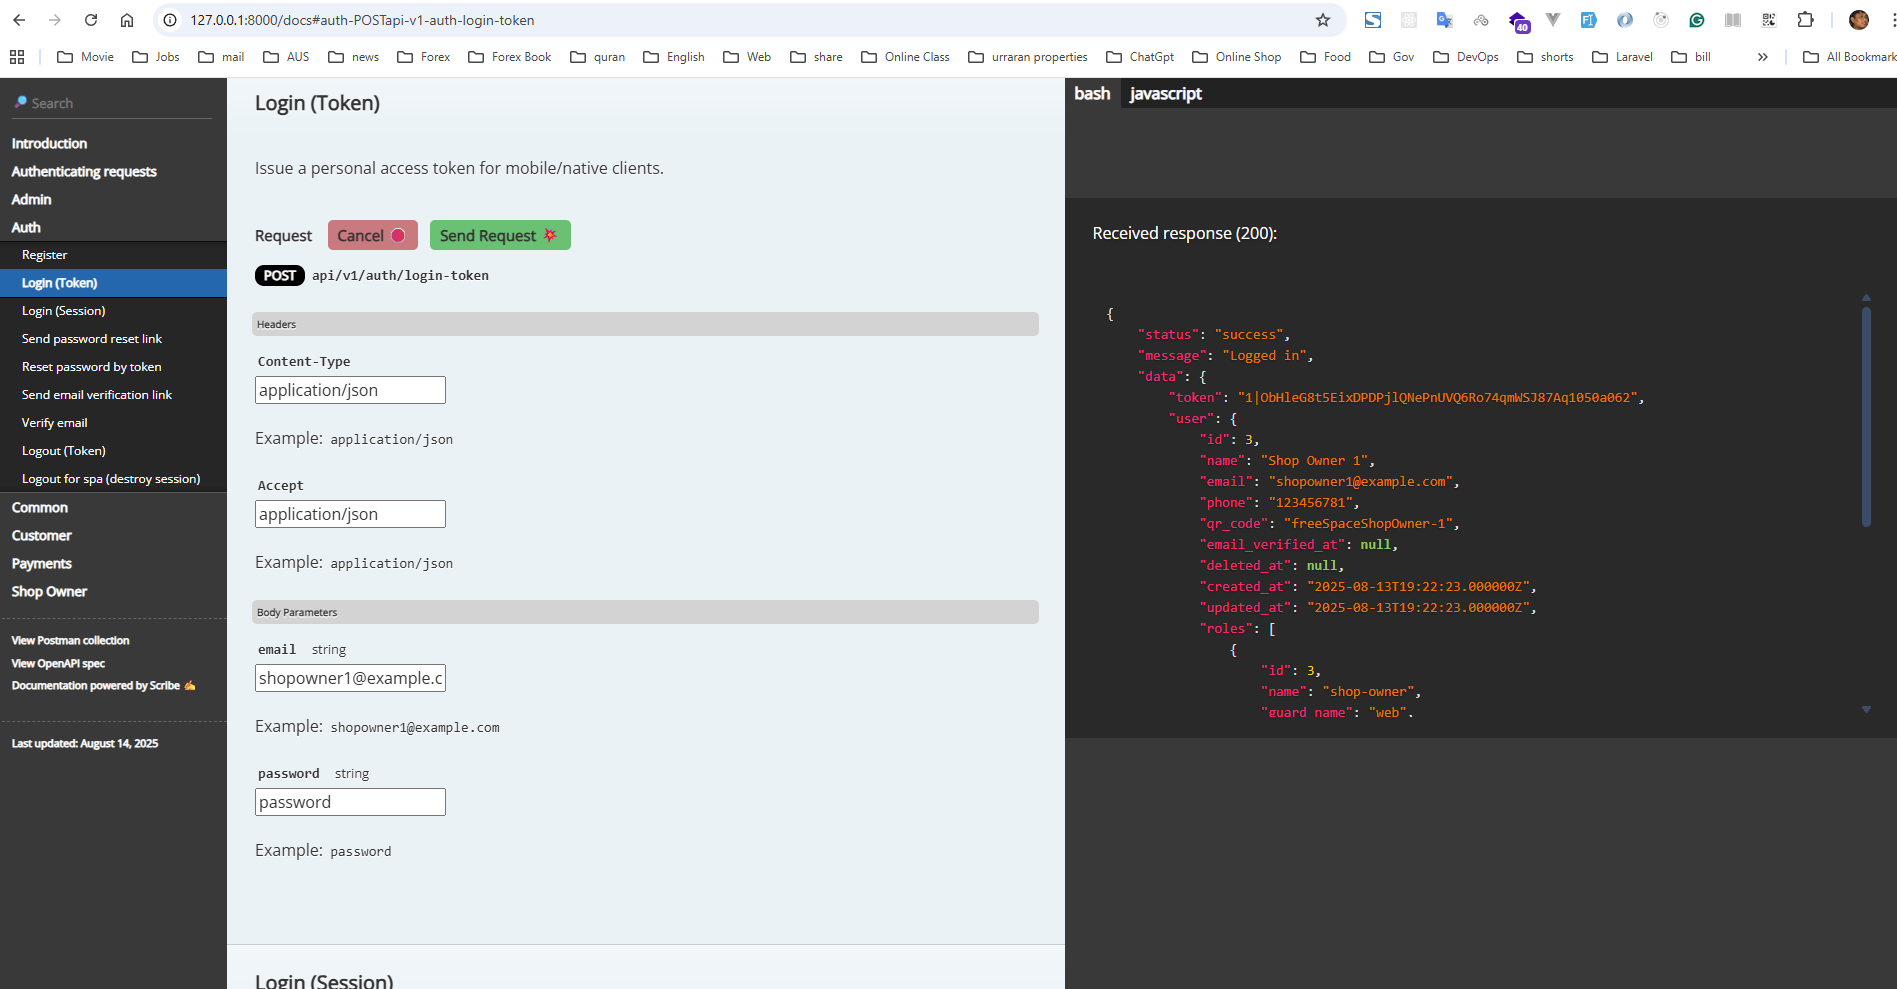
API Overview
REST endpoints for Customers, Shops, Spaces, Campaigns, Transactions,
Settlements, Notifications, and Auth. Auto‑generated with Scribe (commonly
available at /docs route).
Installation (Server)
Check installed software
nginx -v
php -v
mysql --version
composer -V
node -v
npm -v
git --version
UFW configuration
sudo apt update
sudo apt upgrade

sudo apt install ufw -y
sudo ufw allow OpenSSH
sudo ufw allow "Nginx Full"    # or: sudo ufw allow 80,443/tcp
sudo ufw enable
sudo ufw status verbose
Install required software (if missing)
sudo apt update && sudo apt -y upgrade

# Nginx
sudo apt install -y nginx

# MySQL Server
sudo apt install -y mysql-server

# PHP-FPM + MySQL extension (adjust version if needed)
sudo apt install -y php-fpm php-mysql
apt install -y php8.3-xml
systemctl restart php8.3-fpm

# Composer (if not present)
sudo apt install -y composer
Notes: php-fpm installs PHP + PHP-FPM; php-mysql enables MySQL support.
Node & npm setup
# 1. Install nvm (per user)
curl -o- https://raw.githubusercontent.com/nvm-sh/nvm/v0.40.3/install.sh | bash

# reload your shell (or open a new one), then:
export NVM_DIR="$HOME/.nvm"
. "$NVM_DIR/nvm.sh"

# 2. Install & use the latest LTS
nvm install --lts
nvm use --lts

# 3. Verify
node -v
npm -v


###################################################################
## Option B — System-wide (servers/CI) with NodeSource APT repo ###
###################################################################

# 1. Prereqs
sudo apt-get update
sudo apt-get install -y ca-certificates curl gnupg

# 2. Add NodeSource repo for the LTS MAJOR (22 as of now)
sudo mkdir -p /etc/apt/keyrings
curl -fsSL https://deb.nodesource.com/gpgkey/nodesource-repo.gpg.key \
  | sudo gpg --dearmor -o /etc/apt/keyrings/nodesource.gpg
NODE_MAJOR=22
echo "deb [signed-by=/etc/apt/keyrings/nodesource.gpg] https://deb.nodesource.com/node_${NODE_MAJOR}.x nodistro main" \
  | sudo tee /etc/apt/sources.list.d/nodesource.list

# 3. Install Node.js
sudo apt-get update
sudo apt-get install -y nodejs

# 4. Verify
node -v
npm -v
Create developer user (optional)
sudo adduser developer
sudo usermod -aG sudo developer

cat /etc/passwd
groups
su - developer
Create database & user
sudo mysql -u root

CREATE DATABASE free_space;
CREATE USER 'developer'@'localhost' IDENTIFIED BY 'password_here';
GRANT ALL PRIVILEGES ON free_space.* TO 'developer'@'localhost';
FLUSH PRIVILEGES;
EXIT;

# test
mysql -u developer -p -e "SHOW DATABASES;"
Upload project via Github
# Go to .ssh folder
cd .ssh
ssh-keygen -t ed25519 -C "your_email@example.com"

# copy id_ed25519.pub content
cat id_ed25519.pub


#Then go to your GitHub Project Link and add click "Settings" menu then click "Deploy Keys" Menu.
Click again "Add deploy key" button and paste the copied content.

# Go to your terminal and run this command
ssh -T git@github.com

Note: it you see "You've successfully authenticated, but GitHub does not provide shell access." message then you are done.
Upload project and move into place
# Example: upload folder 'free-space' to /var/www
sudo mv free-space /var/www/free-space
Nginx configuration
cd /etc/nginx/sites-available
sudo nano free-space
server {
listen 80;
listen [::]:80;
server_name your_domain.com www.your_domain.com;
root /var/www/free-space/public;
index index.php index.html;
location / {
try_files $uri $uri/ /index.php?$query_string;
}
location ~ \.php$ {
include fastcgi_params;
fastcgi_pass unix:/run/php/php8.3-fpm.sock; # adjust PHP version if needed
fastcgi_param SCRIPT_FILENAME $realpath_root$fastcgi_script_name;
fastcgi_param DOCUMENT_ROOT $realpath_root;
}
}sudo ln -s /etc/nginx/sites-available/free-space /etc/nginx/sites-enabled/free-space
sudo nginx -t
sudo systemctl reload nginxphpMyAdmin (optional)
sudo apt update
sudo apt install -y phpmyadmin php-mbstring php-zip php-gd php-json php-curl

# (optional) expose via your app domain path:
sudo ln -s /usr/share/phpmyadmin /var/www/free-space/public/phpmyadmin

### Or use  this blog in your nginx config file: ###
# Serve phpMyAdmin under /phpmyadmin without touching your repo
  location /phpmyadmin {
      alias /usr/share/phpmyadmin;
      index index.php;
      try_files $uri $uri/ /phpmyadmin/index.php?$args;
  }

  # PHP handler for phpMyAdmin only
  location ~ ^/phpmyadmin/(.+\.php)$ {
      alias /usr/share/phpmyadmin/$1;
      include fastcgi_params;
      fastcgi_param SCRIPT_FILENAME /usr/share/phpmyadmin/$1;
      fastcgi_pass unix:/run/php/php8.3-fpm.sock;
      fastcgi_intercept_errors on;
  }
Project setup
- Copy env
cd /var/www/free-space
cp .env.example .env- Update database in
.env
DB_CONNECTION=mysql
DB_HOST=127.0.0.1
DB_PORT=3306
DB_DATABASE=free_space
DB_USERNAME=developer
DB_PASSWORD=password_here- Install dependencies
composer install --optimize-autoloader
# production: composer install --optimize-autoloader --no-dev

npm install
npm run build- Generate app key & storage link
php artisan key:generate
php artisan storage:link
Set permissions
- Set ownership
sudo chown -R developer:www-data storage
sudo chown -R developer:www-data storage bootstrap/cache- Add users to
www-datagroup (if needed)
sudo usermod -a -G www-data developer
sudo usermod -a -G www-data nginx
groups developer
groups nginx- Directory/file modes
sudo chmod -R 775 storage
sudo chmod -R 775 storage bootstrap/cache
Clear caches
php artisan config:clear
php artisan cache:clear
php artisan route:clear
Migrate database
php artisan migrate --seed --seeder=AppSettingSeeder
# or
php artisan migrate:refresh --seed
Go live: SSL, Reverb, Queue & Cron
SSL with Certbot
sudo apt install -y certbot python3-certbot-nginx
sudo certbot --nginx -d your_domain.com -d www.your_domain.com
sudo systemctl status certbot.timer

# Auto renewal (dry run)
sudo certbot renew --dry-run
Reverb behind Nginx (WebSocket proxy)
Note: replace the domain with yours.
cd /etc/nginx/sites-available

server {
    listen 443 ssl http2;
    listen [::]:443 ssl http2;
    server_name your_domain.com www.your_domain.com.com;

    ssl_certificate /etc/letsencrypt/live/your_domain.com/fullchain.pem; # managed by Certbot
    ssl_certificate_key /etc/letsencrypt/live/your_domain.com/privkey.pem; # managed by Certbot
    include /etc/letsencrypt/options-ssl-nginx.conf; # managed by Certbot
    ssl_dhparam /etc/letsencrypt/ssl-dhparams.pem; # managed by Certbot

    root /var/www/free-space/public;
    index index.php index.html;

    location / {
        try_files $uri $uri/ /index.php?$query_string;
    }


    # Serve phpMyAdmin under /phpmyadmin without touching your repo
    location /phpmyadmin {
        alias /usr/share/phpmyadmin;
        index index.php;
        try_files $uri $uri/ /phpmyadmin/index.php?$args;
    }

    # PHP handler for phpMyAdmin only
    location ~ ^/phpmyadmin/(.+\.php)$ {
        alias /usr/share/phpmyadmin/$1;
        include fastcgi_params;
        fastcgi_param SCRIPT_FILENAME /usr/share/phpmyadmin/$1;
        fastcgi_pass unix:/run/php/php8.3-fpm.sock;
        fastcgi_intercept_errors on;
    }

     location ~ \.php$ {
        include fastcgi_params;
        fastcgi_pass unix:/run/php/php8.3-fpm.sock;
        fastcgi_param SCRIPT_FILENAME $realpath_root$fastcgi_script_name;
        fastcgi_param DOCUMENT_ROOT $realpath_root;
    }

    # Reverb / Pusher-compatible websocket endpoint
    location ~ ^/(app|apps)/ {
        proxy_http_version 1.1;

        # Upgrade to websocket
        proxy_set_header Upgrade $http_upgrade;
        proxy_set_header Connection "Upgrade";

        # Pass through original host & client info
        proxy_set_header Host $host;
        proxy_set_header X-Real-IP $remote_addr;
        proxy_set_header X-Forwarded-For $proxy_add_x_forwarded_for;
        proxy_set_header X-Forwarded-Proto $scheme;
        proxy_set_header X-Forwarded-Port $server_port;

        # Timeouts for long-lived connections
        proxy_read_timeout 600s;
        proxy_send_timeout 600s;

        # Reverb upstream
        proxy_pass http://127.0.0.1:8082;
    }
}
.env updates for Reverb
REVERB_APP_ID=203062
REVERB_APP_KEY=aemlp5pobjolzjbfktj7
REVERB_APP_SECRET=trnmutuqpfgrfuhb2drb
REVERB_HOST=your_domain.com
REVERB_PORT=443
REVERB_SCHEME=https

REVERB_SERVER_HOST=127.0.0.1
REVERB_SERVER_PORT=8082

VITE_REVERB_APP_KEY="${REVERB_APP_KEY}"
VITE_REVERB_HOST="${REVERB_HOST}"
VITE_REVERB_PORT="${REVERB_PORT}"
VITE_REVERB_SCHEME="${REVERB_SCHEME}"
Allow ports (UFW)
sudo ufw allow 8081/tcp
sudo ufw allow 8082/tcp
Build & start Reverb
npm run build

php artisan config:clear
php artisan cache:clear

php artisan reverb:start --debug
php artisan queue:work
If your browser Network tab shows WebSocket status 101, it’s working.
Supervisor – Reverb & Queue
# Install Supervisor
sudo apt-get install -y supervisor

# Reverb
sudo nano /etc/supervisor/conf.d/laravel-reverb.conf
[program:laravel-reverb]
directory=/var/www/free-space
command=/usr/bin/php artisan reverb:start --host=127.0.0.1 --port=8082
user=www-data
autostart=true
autorestart=true
startsecs=5
startretries=3
stopsignal=QUIT
stopasgroup=true
killasgroup=true
stopwaitsecs=20
stdout_logfile=/var/log/supervisor/laravel-reverb.out.log
stderr_logfile=/var/log/supervisor/laravel-reverb.err.log
stdout_logfile_maxbytes=20MB
stderr_logfile_maxbytes=20MB
stdout_logfile_backups=5
stderr_logfile_backups=5
environment=APP_ENV="production"# Queue worker
sudo nano /etc/supervisor/conf.d/laravel-queue.conf[program:laravel-queue]
directory=/var/www/free-space
command=/usr/bin/php artisan queue:work --tries=3 --timeout=120 --sleep=3 --backoff=5 --max-time=3600
user=www-data
process_name=%(program_name)s
numprocs=1
autostart=true
autorestart=true
startsecs=5
startretries=3
stopsignal=TERM
stopasgroup=true
killasgroup=true
stopwaitsecs=60
redirect_stderr=true
stdout_logfile=/var/log/supervisor/laravel-queue.out.log
stderr_logfile=/var/log/supervisor/laravel-queue.err.log
stdout_logfile_maxbytes=20MB
stderr_logfile_maxbytes=20MB
stdout_logfile_backups=5
stderr_logfile_backups=5
environment=APP_ENV="production"sudo supervisorctl reread
sudo supervisorctl update
sudo supervisorctl restart laravel-reverb
sudo supervisorctl restart laravel-queue
sudo supervisorctl statusCron job (Laravel scheduler)
sudo crontab -e

* * * * * /usr/bin/php /var/www/free-space/artisan schedule:run >> /var/www/free-space/storage/logs/cron.log 2>&1

# helpful debug
cd /var/www/free-space
sudo -u www-data php artisan config:clear
sudo -u www-data php artisan cache:clear
tail -f storage/logs/laravel.log storage/logs/cron.log
Video: Deploy on Server (Step-by-step)
Direct link: https://youtu.be/HKaGqeGKGP0?si=WQgs1Z07C5eViUuj
Run with Docker [Local]
Quick Steps
- Go to
./free-space - Copy all files and folders.
- Go to dockerize-k8s-free-space folder.
- Then go app folder and paste this all file
- Start containers (Development):
docker compose down -v docker compose up --build - Open the app (default from our sample compose):
http://localhost:8000
Production
# Bring down old stack
docker compose down -v
docker compose -f docker-compose.prod.yml down -v

# Build & start
docker compose -f docker-compose.prod.yml up  --build

# First-time only (run once, then keep running under Supervisor/Queue if configured)
docker compose -f docker-compose.prod.yml exec app php artisan migrate --seed --seeder=AppSettingSeeder --force
Useful commands
# Logs
docker compose logs -f app
docker compose logs -f webserver

# Tinker / Artisan
docker compose exec -it app php bash

# Stop everything
docker compose down -v
Video: Run on Docker
Direct link: https://youtu.be/SEpYCXJzoLM
Run on Kubernetes (Local)
These steps assume you already have a local cluster (e.g., kind or minikube),
an Ingress Controller, and kubectl configured.
Kind Environment Make
./dockerize-k8s-free-space/kind-setup-for-local./recreate-cluster.shkubectl get nodesHost File Modification
C:\Windows\System32\drivers\etc\127.0.0.1 free-space.comQuick Steps
- Open a terminal in
./dockerize-k8s-free-space/k8s - Create the namespace:
kubectl apply -f .\namespace.yaml - Certificates (local):
if you see a file named
cert-manager-for-server.yaml, move/rename it out of this folder (it's for real servers). Keep the local manifests only. - Apply all manifests:
Note: if CRDs are applied first, a second run of the same command is harmless and resolves ordering.kubectl apply -f .
Trust local TLS certificate (Windows)
- From Git Bash, export the root CA:
kubectl -n freespace get secret freespace-root-ca \
-o jsonpath='{.data.tls\.crt}' | base64 -d > ~/Downloads/freespace-local-root.cer- Open Windows PowerShell as Administrator and run:
powershell.exe -Command 'certutil -addstore -f Root "$env:USERPROFILE\Downloads\freespace-local-root.cer"'Verify resources
# Pods / Services
kubectl -n freespace get all

# Certificates
kubectl -n freespace get issuer,certificate
kubectl -n freespace describe certificate freespace-cert
kubectl -n freespace get secret freespace-app-tls -o yaml

# Ingress
kubectl -n freespace get ingress freespace-ingress
kubectl -n freespace describe ingress freespace-ingress
Restart app
kubectl rollout restart -n freespace deployment.apps/freespace-app

kubectl rollout status -n freespace deployment.apps/freespace-app
Open the app
https://freespace.comVideo: Run on Kubernetes
Direct link: https://youtu.be/SEpYCXJzoLM
Run on cPanel
Quick steps
- Open cPanel → File Manager → go to
public_html. - Upload your project ZIP (e.g.,
free-space.zip) and Extract. - Open the extracted folder (e.g.,
free-space/) → Select All → Move everything into/public_html. - If
.envdoes not exist, copy.env.exampleto.env(right-click → copy/rename in File Manager). - MySQL® Databases: create a database (e.g.,
free_space), a DB user, and grant ALL privileges to that DB. - phpMyAdmin: select the DB and Import
free_space.sql(if you have one). Otherwise you can run migrations via Terminal. - Update
.envdatabase settings:DB_CONNECTION=mysql DB_HOST=localhost DB_PORT=3306 DB_DATABASE=free_space DB_USERNAME=your_db_user DB_PASSWORD=your_db_pass - Broadcasting (Reverb isn’t supported on cPanel): use Pusher or Ably. Example Pusher config:
BROADCAST_CONNECTION=pusher PUSHER_APP_ID=xxxx PUSHER_APP_KEY=xxxx PUSHER_APP_SECRET=xxxx PUSHER_HOST= PUSHER_PORT=443 PUSHER_SCHEME=https VITE_PUSHER_APP_KEY="${PUSHER_APP_KEY}" VITE_PUSHER_HOST="" VITE_PUSHER_PORT="443" VITE_PUSHER_SCHEME="https" VITE_PUSHER_APP_CLUSTER="mt1" - App key & storage link (if cPanel has Terminal: cPanel → Terminal):
cd ~/public_html
php artisan key:generate
php artisan storage:link
# optional
php artisan config:cache
php artisan migrate --seed --seeder=AppSettingSeeder   # only if you didn't import SQL
If no Terminal is available, generate the
APP_KEYlocally and paste into.env.
Video: Run on cPanel
Direct link: https://youtu.be/GJTFbiz8XAU?si=C4BBK9xXrs19dRAV
Run Locally
Quick steps
- Go to the project:
./free-spaceand open it in VS Code (or any IDE). - Create a database named
free_space. - Environment & deps
# from ./free-space
cp .env.example .env
# set DB in .env:
# DB_DATABASE=free_space
# DB_USERNAME=your_user
# DB_PASSWORD=your_pass

composer install
npm install

php artisan key:generate
php artisan storage:link- Prepare data – choose ONE:
# Option A) Import SQL (if you have it)
# Import free_space.sql into your free_space DB using phpMyAdmin or MySQL client

# Option B) Run migrations/seeders
php artisan migrate --seed --seeder=AppSettingSeeder
Or
php artisan migrate --seed- Start services (use separate terminals)
# 1) PHP dev server
php artisan serve

# 2) Vite (frontend) — for local development
npm run dev
# (or build once for a static bundle)
# npm run build

# 3) Queue worker
php artisan queue:work

# 4) Reverb (WebSocket)
php artisan reverb:start --host=127.0.0.1 --port=8081
If you use Reverb locally, set these in .env (and reload Vite if needed):
REVERB_SERVER_HOST=127.0.0.1,
REVERB_SERVER_PORT=8081,
REVERB_SCHEME=http,
plus the matching VITE_REVERB_* variables.
Video: Run on Local
Direct link: https://youtu.be/SEpYCXJzoLM
Demo Accounts
Use these demo credentials for testing. Unless noted otherwise, the password is
password (all lowercase).
Admin
Email: admin@example.com
Password: password
Super Admin
Email: superadmin@example.com
Password: password
Shop Owners (1–20)
Pattern: shopowner{1..20}@example.com
Show full list
shopowner1@example.com  / password
shopowner2@example.com  / password
shopowner3@example.com  / password
shopowner4@example.com  / password
shopowner5@example.com  / password
shopowner6@example.com  / password
shopowner7@example.com  / password
shopowner8@example.com  / password
shopowner9@example.com  / password
shopowner10@example.com / password
shopowner11@example.com / password
shopowner12@example.com / password
shopowner13@example.com / password
shopowner14@example.com / password
shopowner15@example.com / password
shopowner16@example.com / password
shopowner17@example.com / password
shopowner18@example.com / password
shopowner19@example.com / password
shopowner20@example.com / password
Customers (1–30)
Pattern: customer{1..30}@example.com
Show full list
customer1@example.com   / password
customer2@example.com   / password
customer3@example.com   / password
customer4@example.com   / password
customer5@example.com   / password
customer6@example.com   / password
customer7@example.com   / password
customer8@example.com   / password
customer9@example.com   / password
customer10@example.com  / password
customer11@example.com  / password
customer12@example.com  / password
customer13@example.com  / password
customer14@example.com  / password
customer15@example.com  / password
customer16@example.com  / password
customer17@example.com  / password
customer18@example.com  / password
customer19@example.com  / password
customer20@example.com  / password
customer21@example.com  / password
customer22@example.com  / password
customer23@example.com  / password
customer24@example.com  / password
customer25@example.com  / password
customer26@example.com  / password
customer27@example.com  / password
customer28@example.com  / password
customer29@example.com  / password
customer30@example.com  / password